My blog has moved!

BREAKING NEWS!!!!
My blog has moved...Please visit me over at my new blog home:
http://www.chaosserveddaily.com/

You can sign up to follow via email or other paths there, and, if you do, please leave me a comment so I can thank you...and follow you back, if you'd like! Hope to see you there!

Monday, October 31, 2011

Cooking Up a Storm

CHicken-Pot-Pie Recently, I decided I’m tired of spending all my after school time getting dinner ready. I try to make things earlier in the day, but sometimes I forget or flat out don’t feel like it. In my pre-kid life, I was a personal chef, which means I would go to people’s homes and make 12 dinners to go in their freezers while they were at work. I planned meals, shopped for groceries, and took all my own supplies (pans, cooking utensils, etc) and just used their kitchen for the day. I loved it…it encompassed my loves of organizing, list-making, and cooking. And, most importantly, I was helping out other working women and making people happy. Then along came our kids, a couple of military moves, and the recession. So my chef life fell by the wayside. I still enjoy cooking a freezer full of meals for my family, though, so it was high time to stock up.

There are a plethora of books on cooking for your freezer. I have 3 favorites: Prevention’s Freezer cookbook, Dream Dinners, and Don’t Panic It’s in the Freezer. I also have years of recipes that I’ve tweaked to be good freezer meals. I highly encourage you to buy any or all of these books if you’re interested. They all have great basic info on what freezes well, in addition to tons of tested recipes.

Because I inadvertently (meaning through my own poor planning) scheduled my cooking day for a day my kids were all home, I opted to do the easy choice and just stick with Dream Dinners this month. I did add a couple of my own recipes, which I’ll share. I don’t think I can legally share the Dream Dinners ones, but the book really is worth the price. I’ve read a lot of negative reviews of the book, and it does have more corrections than it should on the Dream Dinners website. However, I’ve made almost everything in it and my family has liked virtually everything, as have people whom I’ve given meals. I have not taken the time to correct my book, and everything has been fine. But on with my cooking day.

Freezer Our menu this month:

White Chicken Chili (gallon ziplocs)
With Cornbread and Salad

Mu Shu Chicken Wraps (9x13 pan) (made 2)
With Fried Rice and Miso Soup

BBQ Brisket Sandwiches (plastic containers) (made 2)
With Potato Salad and Raw Veggies

BBQ Brisket Loaded Baked Potatoes (plastic containers)
With Green Salad

Sloppy Joe Pie (pie pan)
With Waldorf Salad

Colorado Style Beef Enchiladas (9x13 pan)
With Black Bean and Corn Saute

Pork Tenderloin with Pears(gallon ziplocs) (made 2)
With Vegetable Confetti Couscous

Pepper Steak (gallon ziploc) (made 2)
With Mashed Potatoes and Green Beans

Kielbasa Bean Soup (gallon ziplocs)
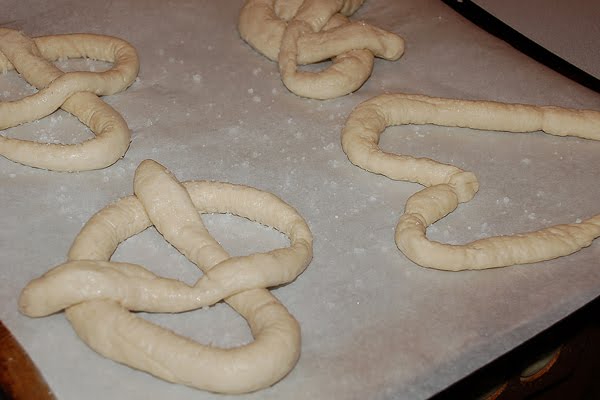
With Fruit Salad and Pretzel Rolls

Heuvos Rancheros (2-8x8 pans)
With Fruit Salad

Cider Braised Pork Loin Chops (gallon ziplocs) (made 2)
With Salad

Chicken with Red Potatoes (9x13 pan)
With Parmesan Green Beans

Chicken Pot Pie (Pie Pan)
With Waldorf Salad

Onion-y Pot Roast (Gallon Ziplocs)

I only made the main dishes...the sides will be prepared fresh. The BBQ Brisket made enough to divide into 4 containers, so we’ll have 2 meals of sandwiches and 2 meals of stuffed baked potatoes. I also made 2 recipes of the Pork Tenderloin with Pears and Cider Braised Pork Loin Chops, which I took to the boys’ teachers at our conferences that night. It was not a bribe. Really. My children are such a delight to teach, I don’t have to bribe. Yeah, that’s my story.

This is the timeline I followed:

Day before:

Bought groceries

Cooked chicken: Bring water to a boil with 1 tsp garlic powder and 1 tsp lemon pepper; add chicken; bring back to a boil, then cook about 10 minutes, until chicken is cooked through. Let cool and chop. I allow 1 ½ breasts for each 2 cups I need when cooked and chopped.

Cooking Day:

8:00:
Start enchiladas
Brown breakfast sausage for Huevos
Make white chili

8:30
Finish enchiladas
Put brisket in oven
Make Mu Shu filling

9:00
Finish Mu Shu wraps
Make Huevos Rancheros

9:30
Cook pasta for Big Greek Pasta
Assemble Kielbasa Bean Soup
Assemble Pepper Steak

10:00
Wash dishes
Assemble Big Greek Pasta
Brown beef for Sloppy Joes
Make BBQ sauce for brisket

10:30
Assemble Pork Tenderloin with Pears (2)
Blanch potatoes for Chicken and Red Potatoes and Cider Braised Pork

11:00
Assemble Chicken Pot Pie
Assemble Chicken with Red Potatoes

11:30
Assemble Cider Braised Pork Chops(2)
Assemble pot roast

12:00
Clean up

12:30
Brisket out of oven to cool
It's afternoon; have a cocktail to celebrate your hard work!

pot-pie A few notes on what I did:

Double bag gallon ziplocs to prevent leakage. I use a Sharpie to write the name, date, and directions directly on the bag.

Pans: Cover with foil, then wrap completely in plastic wrap. I often find 9x13 Pyrex pans with lids on sale for less than $10. I like them because the lid provides a stackable surface. I still wrap these in plastic, to provide a surface the label will stick to. I use white address labels and just write name, date, and directions on them with a Sharpie.

My kitchen here is pretty small, so I did dishes a couple of times throughout, to clear up counter space. You may have more room to just stack up the dirties until the end.

For the brisket, I substituted tri-tip, which was what they had at Costco when I was shopping.

I added kalamata olives to the Big Fat Greek Dream Pasta. It rocks.

I made 19 meals for us, plus 2 more for teachers. I also made a small extra dish of enchiladas with the leftover stuff for my husband to have that night, and some Cottage Cheese Pancake Batter for breakfast or breakfast for dinner. Not bad for a morning’s work. I was done cleaning up by 1300, except for waiting for the brisket and BBQ sauce to cool for freezing.

When you’re cooking for the freezer, try to make anything that actually involves cooking that day first. That way, it has time to cool while you’re making the dishes that just involve assembling. Everything needs to be completely cool before you freeze it, or it’s unsafe in your freezer. One hot item can raise the temp of the entire freezer for unsafe levels.Not that I’m a fanatic about it or anything. Seriously, you don’t want to make anyone sick, just happy.

I spent a little over $150 on groceries, which comes out to a little over $7 per entree, not including the pancake batter and extra serving of enchiladas. These are all meals involving meat, so that ups the cost considerably. I used organics when available, including the chicken. In case any of you health conscious people are appalled at my lack of vegetarian meals, we do eat them at least twice a week. I just didn’t freeze any of them this time. I promise I’ll be making them fresh!

A couple of recipes I can share:

Onion-y Pot Roast:

Place 2-3 lb roast (I used tri-tip), onion soup mix packet, and a can of soda in double Ziplocs. Freeze. Thaw before cooking. Cook in crockpot on low for 6-7 hours. Roast some veggies in the oven to go with it: carrots, bell peppers, new potatoes.

BBQ Brisket

Again, I used 2 tritips (2 lbs each).

Rub tri-tip with Liquid Smoke and place in roasting pan, fatter side up. Rub with 2 Tbsp Lowry’s Seasoning Salt and 2 tsp garlic powder. Cover tightly and roast at 300 degrees for 4 hours. Let cool completely, then slice against the grain.

BBQ Sauce

2 cups ketchup
3 Tbsp brown sugar
2 Tbsp liquid smoke
4 Tbsp Worchestershire sauce
1 Tbsp dry mustard
2 tsp celery seed
3 Tbsp butter
2 Tbsp balsamic vinegar
1/4 cup water

Bring all ingredients to a boil stirring occasionally, and simmer 10 minutes. Let cool and pour over sliced tri-tip before freezing. When ready to serve, thaw overnight in refrigerator and heat in saucepan over low heat.


And there you have it...my cooking day in a nutshell. It's not rocket science...you can do it! I mean, I'm sure you could do rocket science as well, but this is so much easier. My kids were such huge helps...they actually played together, got along, and didn't wreck the rest of the house while I was cooking. I really love those hooligans sometimes!

As the Penzey Spice slogan goes, "Love people; feed them tasty food!"


Boo to You!

dark-jacks

Happy Halloween! The older my kids get, the more we all enjoy Halloween. We try to add a couple of new decorations each year. This year we went into our woods and found 5 or 6 branches (about 7 ft tall) with lots of little branches. The kids made foam pumpkin faces…20 of them…and we hung those on the branches, which were in a big crock on our deck. We strung purple fairy lights and it made a cool Halloween tree. Then, when my mom was here kid-sitting, they added foam purple and black bats to it. It’s definitely something we’ll do again.Halloween-Tree It looks cooler at night, and I never said it was fine art!

guts We carved jack o’lanterns, of course. The little ones enjoyed getting the guts out, and then they loved the roasted seeds. I just washed the seeds and let them dry a little, then put them on a baking sheet. I sprayed them with olive oil cooking spray, sprinkled them with sea salt and black pepper, and roasted them at 300 for about 30 minutes. I think. I forgot about them while we were watching “Hocus Pocus” and my husband rescued them from the oven just as they were perfect.

aidan-carving The oldest was great at carving. In fact, he declared himself the Pumpkin Master. Whatever. He did make a cool pirate pumpkin, though. He used one of those little pumpkin saws, not an actual knife, for those grandparents or social workers who might be reading this!

jacks

Ta-da!

owls

We needed some treats for neighbors, so we dipped giant pretzels in white chocolate, then made eyes with mini Oreos, white chocolate, and chocolate chips. The nose is a jellybean and the claws are melted chocolate. They’re perched at the edge of the caramel apple dip we had for dessert last night. It’s so yummy. I just put some cream cheese in the middle of a platter, drizzle caramel sauce over it (Trader Joe’s Salted Caramel), then sprinkle it with Heath bits from the baking aisle. We have it with Granny Smith apples, because you need to cut the sweetness!

gourds

The boys and I made these for teacher gifts. They should have been fun and easy, but turned into an all-afternoon project. We waited too long to gather our materials…it started pouring rain just as we walked outside. So all the trimmings were wet and we had to wait for them to dry. Once dry, I tried every form of glue I had. Finally E6000 worked, but it takes a long time to dry. The boys were proud of the results, though, and excited to give them to their teachers. I think the teachers probably appreciated something that wasn’t candy.

Oh, and that blurry photo of the jacks up top? I took about a dozen photos, but various family members insisted on walking by the camera just as I pushed the button. The shutter was staying open a long time because it was dark and I didn’t want to use a flash, so the walking by shook every exposure. That one’s the best I managed. Not bad.

Have a hauntingly good Halloween!

Saturday, October 29, 2011

#10- ‘Tis the Season for Snowmen

Xmas7

All Stampin’ Up!: Snow Much Fun stamp set
Marina Mist, Cherry Cobbler, and Whisper White cardstock; Frostwood Lodge DSP;
Cherry Cobbler Seam Tape; Modern Lable Punch; StazOn Jet black ink;
Cherry Cobber, Wild Wasabi, Marina Mist, Pumpkin Pie markers; Cherry Cobbler ink

I wanted to create a card with some watercoloring, but not TOO much in case I needed 500 of them. OK, perhaps I exaggerate, but you know what I mean. Quick and easy. That’s me. My little helpers are almost old enough that they could be taught to watercolor, I think. At least one of them is a very careful color-er, although he tends to saturate his paper. But I digress.

No tricks here…just stamp the image with StazOn ink so it doesn’t smear when you color it. I used an Aqua Painter, but you could use a paintbrush…Aqua Painters are just easier for me. I used the reverse of the plaid DSP for the label…it looks like birch bark, so those are not smears on the sentiment…it’s bark pattern! I think (although my opinion changes daily) this is my favorite card this year. So far.

Sorry I didn’t post this yesterday to wind up my 2 weeks of holiday cards. We took a mini trip down to Chicago…Legoland Discovery and the Children’s Museum at Navy Pier. And IKEA, of course. If you’re military and find yourself in Chicago, the Children’s Museum has free admission for up to 4 people. So we left the littlest hooligan at the coat check. No, not really. We paid her way. But $12 is way better than $60!

We stopped at the Milwaukee Zoo for trick-or-treating on the way home, which was a blast. I’ll post photos later this week. Enjoy your weekend!

Thursday, October 27, 2011

#9 ‘Tis the Season for Glad Tidings

DSC_0011

All Stampin’ Up!: Jolly Jingles jumbo roller and Warmest of Wishes stamp set (hostess)
Real Red ink; Very Vanilla and Soft Suede Cardstock; Real Red DSP
Houndstooth Embossing Folder; Corner Rounder; Soft Suede Marker

Roller stamps make such quick work of adding an impact! This entire card took maybe 10 minutes, and that’s only because I had already put stuff away and had to get it out again. I inked the “Warmest of Wishes” stamp with Real Red, then wiped off the lines and used a marker to ink them. For the “ribbon,” I cut a 1” strip of the DSP I’m using for photo backgrounds, scored it with my new scoring board that I love, and pleated it. Easy peasy. I popped the sentiment out so the pleats would fit behind a little and not make it lumpy. It’s a kind of elegant color combo, I think.

The Warmest of Wishes stamp set is a hostess set in the Holiday Mini. It has several seasonal stamps and I’m really getting a lot of use out of them. You, too, could earn it with a workshop or an order of $150 or more. And who can’t find $150 of things they can’t live without in the catalog?

Wednesday, October 26, 2011

#8 ‘Tis the Season for More Stockings

Xmas3

All Stampin’ Up!: Stitched Stockings and It’s a Wrap Holidays stamp sets
Very Vanilla and Poppy Parade cardstock; Scallop Border Punch
Island Indigo, Poppy Parade, and Lucky Limeade inks;
Lucky Limeade and Island Indigo Ruffled ribbons; 5/16” Chocolate Chip brads

This color combination is one of my favorites this Christmas. It’s so joyful and evokes memories of all those Christmas-y things…holly berries, candy canes, frosty nights, and margaritas. Well, I had to think of something for the green. I like this shade’s edginess. Yes, that’s a thing.

The Very Merry stamp is from the It’s a Wrap Holidays set. It’s really designed to be a wrapper for Hershey’s Nuggets, and it’s very cute that way. Put several of them in a little cellophane bag, top it with a tag and ribbons and you have a nifty neighbor or teacher gift. But I wanted to show it’s versatility. The stockings coordinate with the Stocking Builder Punch, but I thought they looked fine just stamped, as well. Each panel is popped out with dimensionals, for a little interest.

Now go have a margarita and get in the holiday spirit!

Tuesday, October 25, 2011

I Always Feel Like…

…Somebody’s watching me. Or at least that song’s been stuck in my head as I made Halloween Eyeballs today. I’ve been making these for at least 10 years, and now I think it’s my signature Halloween treat. How sad is that? I’m the eyeball lady.

They’re basically Buckeyes that have been gorified. That’s right, not glorified. Gorified.

Halloween Peanut Butter Eyes

1 lb smooth peanut butter (I use the natural, but any works)
2 sticks butter
1 1/2 lbs powdered sugar
2 bags vanilla candy melts
1 medium bag plain M&Ms
some red food coloring and a small paintbrush

Mix the peanut butter, butter, and sugar together. It will be crumbly; you’ll have to knead it until it’s like Playdough. Roll it into 1” balls and place on waxed paper on 2 rimmed baking pans. Some that will fit in your refrigerator. Chill them overnight. This makes around 80. Only 60 made it to actual eyeball-ness today, because my husband found them in the garage frig. He loves naked eyeballs!

Dipped-eyeballsAfter they’re cold, melt 2 packages of vanilla candy wafers. I’ve tried actual white chocolate, but it just doesn’t coat well. You don’t want lumpy eyeballs. Using a toothpick, spear the balls and dip them. Put an M&M on them as a pupil and a clever camouflage for the toothpick hole. Then put them back in to chill. I don’t use red M&Ms because I’m going to put red veins on next. I like the look of orange best. Yellow is good, too, for gross eyes, but my entire bag of M&Ms only had 12 yellows. Eyeballs-with-veins

Put a little red food coloring on a plastic lid or piece of foil. Use a very small paintbrush to paint veins on your eyeballs. I mean, the eyeballs. (If yours are like mine, your children ensure that you already have red veins in your eyeballs.) It really doesn’t take long. Then put them back in the frig to dry or if you have room on your counters and little fingers won’t pick them up, you can leave them out. Out is actually better because sometimes they sweat when you take them out of the frig and the red smears a little.

I spent about 30 minutes last night making and rolling these. Then today another 30 minutes dipping and painting. It’s the 12 hrs of chilling between steps that forces you to plan ahead, at least a little.

Everyone I've ever shared these with loves them...kids, friends, soldiers. Of course, soldiers love anything, but that's beside the point. If you don't make them into eyeballs, they're just as tasty dipped in a little dark chocolate instead. It's always okay to play with your food a little, though, especially at Halloween!

#7 ‘Tis the Season for Embossing

Xmas5

All Stampin’ Up!: Dasher, Serene Snowflakes, and Four the Holidays stamp sets
Bashful Blue, Marina Mist, and Whisper White Cardstock,
Silver Waffle Paper; Silver Glimmer Paper
Silver and white embossing powders; Versamark and White Craft inks

This waffle paper was so fun to work with…I just cut a piece 1 1/2” wide the width of the roll (about 9”) and that was plenty for the card. It pleats so easily and since it’s paper, regular SNAIL adhesive works to hold it. No fancy tricks to this card; just stamping and embossing. I think it’s elegant, but still a little fun with the ruffled paper.

I’ve used Frostwood Lodge DSP as the background for most of the card photos I’ve been posting. The colors in it include Cherry Cobbler, Garden Green, Early Espresso, Marina Mist, and Whisper White. I like a little blue thrown in with my Christmas colors, and usually some sort of brown, so this pack is perfect in my opinion! If you have a hankering for some, it’s in the Holiday Minicatalog. (Item 124002, $10.95 for 12 double-sided sheets).

Off to yoga and the grocery store now…I’m planning to center myself and get in the zone for cooking tomorrow. Enjoy the day!

Monday, October 24, 2011

#6 ‘Tis the Season for Shakin’

Xmas6

All Stampin’ Up!: Kidoodles and Four the Season stamp sets
Real Red, Wild Wasabi, Whisper White cardstock; Wild Wasabi DSP
Scallop Edge, 1 3/4” circle, 2 3/8” Scallop Circle punches; Shaker Frame
Cherry Cobbler Bakers’ Twine; Real Red, Wild Wasabi, More Mustard markers

As soon as I saw the shaker frames in the Holiday Minicatalog, I knew I needed to put some glitter/snow in one on a card. These frames are pretty nifty…they’re basically a ring of the same foam on Stampin’ Dimensionals, so there’s a little room for something to shake, but not so thick that you can’t mail them in a regular envelope. I’ve made some shaker designed I really liked in the past using round treat cups, but those are too thick for a regular envelope.

I stamped the little elf in Jet Black Staz-On, then colored with the markers. The colors look a little off in the photo, but they are the same as the papers in person. The "stitching" is just white gel pen, but I thought it added a great detail.

On a household note, I’ve decided I’m tired of cooking dinner every night. Unfortunately, our household budget does not allow for a chef (and my family wouldn’t let me get away with that, anyway!). Consequently, I’m planning a ginormous cooking day on Wednesday. I think I’m putting 12 different meals in the freezer. The flaw in my plan is that I forgot my boys are home for parent-teacher conferences all day Wednesday. So I may have a few extra hands slowing me down.

In any event, I’ll plan to blog about it with the timeline and recipes next week. The boys are also out of school Thursday and Friday, so it’s really like today is my Thursday with a long weekend coming up! Ack! WIsh me luck!

Friday, October 21, 2011

#5 ‘Tis the Season to Be Jolly

Xmas8

All Stampin’ Up!: Festive and Fun stamp set; Crumb Cake and Whisper White Cardstock;
Old Olive, Riding Hood Red, Pacific Point, and Pumpkin Pie Markers; Mini Jungle Bells
Riding Hood Red Taffeta Ribbon; Cherry Cobbler Bakers’ Twine; Corner Rounder punch;
White Craft Ink; Stripes Embossing Folder

This card makes me smile. It’s whimsical yet classic, I think. I embossed the stripes, then dragged white craft ink pad across to add a little pop. I always forget how much I like coloring my stamps with markers for all the different colors, rather than just inking the stamp on a pad and coloring in later. It’s a happy little card.

And now I’m off to pick up my mom at the airport…she’s here for the weekend, so my sweetie and I are headed to Door County (up north) for a getaway. We were supposed to be flying to Kansas City for an annual recruiting training conference for the next 5 days, but the Army has no budget yet, so the trip was cancelled last week. Oh, well, it’ll be fun to check out the almost local sights instead!

Hope you have a fun weekend and find time to craft a little!

Thursday, October 20, 2011

Pickin’ Apples

apples

Last weekend we ventured down to Mukwonago to The Elegant Farmer. It took about an hour, even though it was only about 30 miles away. Remarkably, the trees were still vibrant even though ours are bare. F’s kindergarten teacher had recommended the place. A huge yellow barn with a smiling face greeted us. Inside were all kinds of autumnal gourmet delights. The Elegant Farmer has been on Throwdown with Bobby Flay on Food TV for their Apple Pie Baked in a Paper Bag. We bought a frozen cranberry-apple one to bring home and bake. I’ll let you know how it is. I picked up some caramel that you use to dip apples in, but A (the oldest) told me I could make it way better. He’s a boy after my heart.

doughnuts

We fortified ourselves with cider doughnuts before heading out to the orchard. The doughtnuts were tasty, but not as good as we’ve had in upstate New York and Washington State. But, really, have you ever had a BAD cider doughnut? I thought not.


IMG_0180


The eldest was the first to realize he could climb the trees. Up to that point, they were taking turns sitting on my husband’s shoulders. We weren’t there to pick many apples, obviously.


boys-in-tree


Then the middle one figured it out.


3-in-a-treeOf course Princess Thundercloud had to get in on the climbing. By this point there were no other families anywhere within our sight. Have I mentioned that our children are incredibly loud? I blame it on their father with the artillery ears. They’ve spent their lives yelling at him.


Frank-and-I


I can’t wait for one of our children to be taller than I am. Then you won’t be looking up our noses in every photo. Hopefully.


We spent a happy Sunday morning picking and eating, then headed towards home. Luckily, there was a Texas Roadhouse AND the only Sonic anywhere near on our route. We stopped at the Roadhouse and had some fried pickles. Sonic probably wouldn’t have had them now, anyway. Of course, I’ll have to return soon to verify that. For now, I’m busy thinking of creative ways to use these apples. They’re mostly Jonathans, so good for eating but not great for cooking.

Here’s the scrapbook page I made of the day…enjoy, and go eat an apple!

Apple-Picking

#4 Tis the Season for Hanging Stockings

You’re going to want to make lots of these cards. Trust me. They come together really easily AND you get to use punches. Plus, it’s a super cute card. Can’t you just hear the fire crackling below the stockings?Xmas4

All Stampin’ Up: Four the Season and Woodgrain stamp sets
Whisper White, Garden Green, & Crumb Cake Cardstock; Frostwood Lodge DSP;
Silver Glimmer Paper; Cherry Cobbler and Chocolate Chip inks; Mini Jingle Bells;
Cherry Cobbler Bakers’ Twine, Eyelet Border & Stocking Builder punches

I like how the Eyelet Border makes it look like a mantel with a scarf on it, and the mini jingle bells add a festive touch. The silver glimmer paper gives a bit of shine. THe jingle bells are adhered with Crystal Effects, just to be sure they don’t fall off. I put a dimensional at the top of each stocking and left the bottom loose, so it’s more like they are hanging on the twine. You could punch about a gazillion of these stockings from DSP in no time at all, then mix and match the trim.

Once again, my laundry did not do itself while I was running errands this morning, so I have a date in the laundry room. Enjoy the rest of your day!

Wednesday, October 19, 2011

Pumpkin Smoothies and Rollin’ Your Own

I was reminded of something at the Pumpkin Patch last week. Many animals grow a thicker coat and fatten up for winter. Therefore, it’s entirely natural that I’m in the mood to cook again, now that the weather is cooler. By cooler I mean that we went from high 70s to 40s in the space of a week. Apparently when it falls, it falls quickly in Wisconsin. Anyway, I bought a thicker, warmer coat, and now I’m working on putting on a little extra layer!

Pumpkin-Coffee This pumpkin latte smoothie is my attempt to control the fluff. It’s a healthy alternative to a pumpkin spice latte from a coffee shop, the nearest of which is a twenty-minute drive and would involve changing out of yoga pants because it is not a drive-through. Here’s how to whip one up for yourself.

Pumpkin Latte Smoothie

1 cup strong brewed coffee
1 cup almond milk
1 scoop Jillian Michaels Whey Protein Vanilla Shake mix
1/4 to 1/2 cup pumpkin puree (from a can, of course)
Optional: Psyllium for fiber, a banana, a handful of ice cubes, and, if you’re really feeling thin, a dollop of sweetened condensed milk. Not that I would do that.

Blend it up, top it with a little pumpkin pie spice, and enjoy!


Last night we had Broccoli Three Cheese Soup for dinner, and I found myself out of any tasty bread to accompany it. I found some great sounding recipes on the King Arthur Flour website, but ultimately thought Hot Buttered Pretzels would be fun to make.


After making the dough in the food processor, it had to rest 30 minutes. I divided it into 8 pieces and let it rest another 5 minutes. Then it was time to roll!

They had fun, no matter what you heard, rolling their own. I certainly don't want one their grubby little hands touched. By the way, it was "red" day at school. They don't normally all dress alike. Today is "pink" day so the boys conceded that I could tie a pink ribbon on their wrists. I'm sure they cut it off as soon as possible.

After we shaped them, they had to rest another 10 minutes. It was just enough time for a cocktail. Unfortunately, all I had handy was some seltzer water. At least it had lime in it.


About ten minutes in the oven, and we had pretzels almost as good as the ones at the mall. The closest mall is about an hour away, so I'm willing to settle for "almost as good." It kept my kids busy and they didn't wreck their rooms after school, so there's another advantage! Oh, and, of course at the mall you would never be able to get a pretzel with green marker incorporated, now would you?


‘Tis the Season for a Little Glitter…

Xmas2

All Stampin’ Up!: Four the Holidays stamp set
Early Espresso, Confetti Naturals, and Crumb Cake cardstock
Vintage Wallpaper Embossing Folder; Snowflake punch; Basic Pearl

My husband hates glitter. Now that we’re living in a rental again (for 21 more months, but who’s counting), he thinks he has the reasoning to stop my glitter use. But he’s wrong. I have a Dyson, and I’m sure I can get up all the stray glitter. Or most of it, anyway. It’s not like he’s deploying and going to be over in the desert sparkling for the enemy to see or something. I can respect that, and I don’t use glitter on cards that are making their way to the sandbox. But the ones I send to “civilians”... Bring it! Or bling it, I should say.

This card really is MUCH prettier in person. To make it, I dragged a Versamark pad across one side of an embossing folder so that the ink was only on the raised portion and put a piece of Crumb Cake cardstock inside. I rolled it through the Big Shot and sprinkled some Iridescent Ice embossing powder on it, then heat embossed it. Yes, I used my Big Shot AND my Heat Tool. Woo-hoo! The rest was simple...a sentiment stamp, a snowflake punch, and a pearl to anchor the snowflake.

I wish I could take complete credit for this card, but I CASEd the basic idea from someone online a year or two ago. My apologies if you’re reading this…comment and I’ll give you credit gladly!

I’m not saying you should make 50 of these, but a few would be nice for good friends. And by that I mean the people who will save the handmade cards they receive and really appreciate them...you know who you are!

Tuesday, October 18, 2011

Remiss, yet again

I just realized, while checking out the demonstrator support area on Stampin’ Up! (where we get the top-secret recipe for the kool-aid), that I have been seriously remiss is sharing their news. During the month of October, if you sign up to become a demonstrator, you’ll get a Big Shot ABSOLUTELY FREE! If you’ve been reading my blog, as you obviously have been, you know how much I love my die-cutting capabilities. It’s almost like power tools for my husband, I think. If you don’t NEED a Big Shot (and that would only be because you already have one), you can get $100 of FREE stamps and products instead. bigshotstarter_flyer_US_oct

It really is a great deal, if you’ve been mulling over becoming a demonstrator. I’ve been a demo for almost 6 years now, and love that opportunities it gives me for creativity as well as the friendships I’ve found. I could be making a little spending money at it, as well, but we all know I just spend it all on stamps, anyway.

There are a couple of other cool things going on at Stampin’ Up! as well. I’m waiting for my cookie stamps to arrive. I have all sorts of nifty ideas brewing for those. The Simply Sent card kits are a fun gift idea for teachers, or they are a super quick way to create hand-crafted cards for you!

image image

If you’re interested in any of the above spiels, let me know. You can order or sign up to be a demonstrator right on my website. You’ll need the “top secret handshake code” to sign up, so just email if that’s the case. Otherwise, shop away!

But I’d really like for you to come join me in the Land of Demonstrator Bliss…

‘Tis the Season- for Lovely as a Tree

Apparently my family feels they still need to eat, have clean clothes, and be able to walk through our home without tripping over the piles of dirt, as well as be transported to places they need to go. That’s really for me, so they’re not home with me 24/7. So today’s post is just a quick holiday card…enjoy!

DSC_0007

All Stampin’ Up: Lovely as a Tree and Sincere Salutations stamp sets
Crumb Cake, Whisper White, Cherry Cobbler, and Garden Green Cardstock
Garden Green and Cherry Cobbler inks; Early Espresso marker
Frostwood Lodge DSP; Lace Ribbon Border and XL Oval punches

Seriously, it’s the quickest one I designed. The Lace Ribbon Border punch really adds a lot of detail with very little effort…but no one needs to know that when you send them this card! The DSP is just the same paper from the Frostwood Lodge package, using both sides. The strips are 4-1/4” x 2” and 4-1/4” x 1”. I sponged around the edge of the oval just to make it pop a little, then popped it further with dimensionals. For the tree, I inked the whole thing with my Garden Green pad, then wiped off the trunk and ground portion. I colored that with a marker, huffed on it to revitalize the ink, and stamped. Easy-peasy. And I got to use the word “huff” in a post.

By the way, that tree piece is straight…for some reason when I took the photo it was slightly distorted. Perhaps because I was trying to take photos outside for the natural light but the wind was gusting at about 75 mph, so speed was of the essence. I could also hear little voices calling, “Mama, mama, where are you?” inside the house, too, so that increased the urgency.

I didn’t even have time to do anything with apples today other than slice them up on the kids’ breakfast plates…maybe tomorrow!

Monday, October 17, 2011

‘Tis the Season…already?

Yes, it’s time to get your brains working and figure out what you’re doing for your hand-stamped holiday cards this year! That was mean for a Monday, wasn’t it? Well, I plan to make it up to you. I had a burst of creativity over the weekend, so for the next 10 posts, I’ll have a new holiday card design to share. Some may look complicated, but they really aren’t…no sweat shop origami cards this year!

To jumpstart my Monday (everyone here was lethargic…too much family fun over the weekend, I suppose), I made some really hearty (and that does not mean not tasty) multigrain hot cereal. We picked apples yesterday, so guess what ingredient will feature heavily in our meals this week? Yes, apples! I’ve been making myself a pumpkin coffee smoothie for the last few mornings, and being a pumpkin fanatic, I wanted to incorporate that, as well. The result was delicious!

Fall-Multigrain

I just cooked some multigrain hot cereal according to the directions on the package and added some brown sugar. Okay, quite a lot of brown sugar. Then I stirred in a handful of craisins and about 1/4 cup pumpkin (from a can) for each serving. Some diced apples on top, and voila! My kids thought it was great, too.

Now for the card….

Xmas1

All Stampin' Up!: Delightful Decorations, Christmas Greetings, and
Distressed Dots stamp sets; Cherry Cobbler, Baja Blue, Old Olive, and
Whisper White Cardstock; Cherry Cobbler, Baja Blue, and Old Olive inks;
Cherry Cobbler Bakers' Twine; Ornament punch

To make the 3-D ornament, I stamped then punched 3 identical ornaments. Fold them in half vertically and adhere the sides. Tie your bow after you make the ornament 3-D, or the tie will be too tight for it to fold out. I think it would be cute with some rhinestone bling added to the sentiment, but wanted to keep this simple and quick. You could also put Old Olive ribbon on top of the paper strip for a little more texture. My favorite feature of the Christmas Greetings set is that it has a nice little verse for inside the card, as well as the front. And it's inexpensive!

Tune in tomorrow for another card idea! And maybe another use for apples….

Friday, October 14, 2011

Ending the week with Day of Gratitude

One of my friends (Thanks, S) posted a quote on her Facebook page last week:

“What if you woke up today with only the things you thanked God for yesterday?”

It’s been popping in and out of my mind ever since, so I thought a gratitude card would be a good ending to the week.

DSC_0001

All Stampin' Up!: Day of Gratitude stamp set; Cajun Craze, Early Espresso, So Saffron inks;
Not Quite Navy Cardstock; Well Worn DSP; Decorative Label and XL Oval Punches;
White Bakers' Twine; Wood Sheets

I received the Day of Gratitude stamp set last October at the Stampin’ Up! regional conference in Portland, OR. I used it quite a lot, then it got put on the bottom rack of stamps as I started designing holiday cards. When we moved this summer, it was, as always, kind of like Christmas when I started unpacking my craft room. I tend to forget about stamp sets then I’m reminded how much I like them when I see them again. I’m like a three-year-old that way!

I really like the way our classic inks look on the wood sheets. The sheets can be used in the Big Shot but here I just cut them with my paper trimmer. I wanted Early Espresso twine, so I pressed white baker’s twine into the Early Espresso ink pad and let it dry for a few minutes (while I picked up hooligans from the bus). Combining the two punches gives a nice layered focal point without much effort, and I’m all about that!

Now I’m off to the pumpkin patch/corn maze with my kindergarten blessing…and those of 21 other parents. Enjoy your weekend (if that’s what you choose to do)!

Thursday, October 13, 2011

A Confounding Corn Maze

I saw a story on the news today about a family that had to call 911 after getting lost in a corn maze. It was dark, they had a 3-week-old baby with them, and the woman sounded pretty terrified. After police and corn maze employees arrived, it apparently took about a minute for them to be found. But I can empathize.

Every year, our hooligans anticipate the local corn maze visit. In Washington, the maze was conveniently located just down the road from the local cider mill, so we could get hot apple fritters and icy cold apple cider slushes to fortify ourselves before the maze. Ah, good times. We ventured out to the nearest maze here in Wisconsin last Sunday. We even went to Mass on Saturday evening so we could get an early start on Sunday. I know, nothing like worshipping when it’s convenient for you!

The parking lot was already packed when we arrived, but we were able to get some good photos with the huge pumpkins without any other people in the background. Then we headed over to the maze. The only sustenance to be had that early was popcorn, so my husband grabbed that, bought tickets, and off we went. The pattern was the Cat in the Hat and it was spread over 8 acres. That’s a pretty big maze, when the corn is like nine feet tall. When we asked if there was a map, the teen taking tickets just laughed and handed us a quiz sheet. He told us that if we answered the questions correctly, the answers would guide us. Hmmm.

Fifteen stops, with 3 hidden hole punches somewhere in there. The clues were multiple choice questions about all things Dr. Seuss. We did okay for about 3 checkpoints, then wandered around until we found an overlook and discovered #8. Everyone else was just as confused, and we all just kind of helped each other out. We managed to find all 3 hidden points and punch our contest entry before making for the exit. My husband rationed the popcorn throughout the hour it took, just in case we needed emergency provisions. That, and he didn’t bring any water, and the popcorn was quite salty.

We all felt quite the sense of accomplishment upon escaping. When I handed in my contest form, I asked what the prize was. The same teenage boy informed me “they” hadn’t decided yet. Really? So we may have risked our very lives for a chance to win….what? An apple? A trip to Hawaii? I think the answer lies somewhere in between.

After all that trauma, we fled to the local burger and custard stand to recover. It took me a few days but I decided the memories had become warm and fuzzy enough by today to scrapbook the trip. Here’s the result. I bet you’ll be a-MAZE-d. Ha. Oh, and I forgot to mention that my name was drawn from the hat to chaperone the kindergarten field trip to the same maze/pumpkin patch tomorrow. I think I’ll pack my GPS and some flares. Just in case.

Corn-Maze

Supplies: Easy as Pie Template #16 from Shabby Princess

Faded Story and Fall Friends Digital Kits from Pxl Cafe

Wednesday, October 12, 2011

Flowers from Spice Cake

I actually mailed these cards. Aren’t you proud of me for letting them go? Of course, I kept a couple for my stash (of cards that I’ll never actually mail).

Gretchen-BDay All Stampin’ Up!: A LIttle Birthday Cheer stamp set (retired)

Crumb Cake cardstock and Spice Cake DSP

Spice Cake Designer Fabric and Buttons, Crumb Cake Taffeta Ribbon

Top Note and Fun Flowers Big Shot Dies, Hemp Twine, Modern Label punch

The fabric comes in a set of 3 different patterns, so I cut out two sets of flowers from each. That allowed me to mix and match and make a bunch of flowers for various card combinations. After cutting the Top Note, I flipped the frame over so that both sides of the DSP showed…one background, one frame, no scraps. Well, I had to trim the frame a bit…the Top Note was not exactly centered when I cut it. If you don’t already have one, a die cut machine of some sort is a great timesaving tool. My kids love cranking the handle, so they even help out occasionally.

If you don’t have a die cut machine, here’s another flower idea that only uses the scallop circle punch. Of course, you’ll still need to cut out the frame with your die machine, so why not just get one? It’s a slippery slope, and I want you all to come with me!

Shelli-BDayAll Stampin’ Up!: Create a Cupcake and Woodgrain stamp sets

Very Vanilla Cardstock, Spice Cake DSP

Antique Brad, Scallop Circle and Modern Label Punches, Chantilly Crochet Trim

Top Note Die, Uniball White Gel Pen

I used only the frame from the Top Note die. To make the flower, punch 5 scallop circles. Fold 4 of them into quarters, then use the last one as a base and adhere your quarters. Put a brad in the center. I cut the edges after I folded them, just to give a little more dimension, and tucked the greeting between the layers. The whole card front is mounted on a Very Vanilla card base, so the ribbon is hidden between the front and base.

This sketch is really quick to redesign. You just need a frame, a sentiment, and a focal point. You could cut a large flower out of a printed paper, or use a self-adhesive diecut (that’s Stampin’ Up! for sticker). It could be a cupcake, a Christmas tree, or a pumpkin…I’m sure you get the idea.

Hope you have time to be creative today…or at least enjoy the fall leaves!

One last photo from the shoot

Dragonfly-mouth I forgot to post this with all the others on Monday….I was taking photos of the littlest one and looked up to see this. I asked what he was doing, and he said he saw a dragonfly. Oh. Not gonna get that mouth sewn shut, I guess!

Tuesday, October 11, 2011

A Blushing Cupcake

Just to show how versatile Stampin’ Up! makes Designer Paper packs, here’s a slider card using the same DSP as yesterday’s cards for kids.

Cupcake All Stampin’ Up!: Create a Cupcake stamp set

Just Add Cake DSP; Whisper White, Blushing Bride, and Early Espresso Cardstock

Marina Mist 1/8” ribbon, Build a Cupcake and Scallop Edge punches

If you’ve not made a slider card, they’re kind of a fun alternative. Just cut a 4 1/4” x 11 card, score it at 5 1/2”, then cut off about 1” or 1 1/2” from the end, depending on how much of your slider piece you want to show. The slider is 3 1/4” x 5”. Just adhere along the sides and there you go!

Cupcake-Slider Here’s what it looks like with the slider out a little. I thought the ribbon pull tab was pretty self-explanatory, but my husband tried to just open it like a regular card. But he’s a guy. Probably the friends you send this to would understand the tab.

The Create a Cupcake stamp set has some fun images for stamping your cupcake with patterns and such, then punching it out. I went with simple here, using just the punch and plain cardstock.

Sliders make a good choice for invitations or announcements, as well. You should try making one today. Right now. Let your family fend for themselves. They’ll be fine.

Monday, October 10, 2011

A Bit of Whimsy

I find myself in need of cards for various occasions. Ideally, I would design a card, make a whole bunch with various sentiments, and be prepared. I do, in fact, do this. Then an occasion arrives, and I decide that I need to design a new card. So I do, and my stash of ready-to-send cards remains untouched. They do make a great last minute teacher gift, though…a set of greeting cards for them to send. Heaven knows teachers don’t have time to be making cards. At least my boys’ teachers don’t, with all the phone calls to parents they have to make everyday after school. Or maybe they just have to call me.

Anyway, I felt like making some fun birthday cards. Here are a couple:

Pennant-Bday

All Stampin’ Up! supplies: Bring on the Cake stamp set

Just Add Cake DSP, Poppy Parade and Whisper White Cardstock

Staz On Jet Black Ink; Poppy Parade, Marina Mist, Pumpkin Pie,

Wild Wasabi markers; Petite Pennants and Scallop Edge punches

White Bakers Twine

I wanted to play with the Petite Pennant builder punch that’s been sitting on a shelf in my craft room for a couple of months now. I’m so glad I finally did. It was quick and easy to punch out all the pieces for this card, and the only stamping was the sentiment. These would be super speedy to mass produce (if you’re inclined!), and I think it would work for any age, child to grandparent!

Octopus-BdayAll Stampin’ Up! supplies: Kidoodles stamp set

Just Add Cake DSP, Marina , Wild Wasabi, and Whisper White Cardstock

Jet Black StazOn ink, Uniball White Gel Pen

So Saffron, Marina Mist, Wild Wasabi, and Pumpkin Pie markers

1 3/4”, Scallop, 3/4”, and 1/2” circle punches; corner rounder punch

My kids love this stamp set and bugged me to make a card, especially the almost-8-yr-old (the octopus has 8 tentacles, get it?). The “2” and “u” I just punched out of the DSP. The octopus color looks off, and I’m not sure why. Oh, well. Perhaps he’s seasick or something. I really like this stamp set, too…it has a great variety of messages. I also used dimensionals to pop out the greeting and the “u.” It felt a little naked at the end, so I added the white hash marks for a little interest.

There you have it…tomorrow I think I feel some designs for the grownups in my life brewing.

A Slightly Less Painful Shoot…

I’ve been biding my time since July when we moved into our house surrounded by hardwood trees. I knew the fall colors would be glorious, and the kids were so excited to pose for photos. Not. Being the good mother that I am, I shamelessly bribed them with candy bracelets (they sell themselves pretty cheaply).

Edited-3-in-leaves

The hardest part was convincing my husband not to clean up the leaves in the yard before the weekend. Of course, he spent most of Saturday afternoon blowing and raking, with the boys’ help, and you can’t even tell it today, so many more leaves have fallen. His man-logic is that it’ll be quicker to do it several times with a lighter layer than all at once. I think he just wants to use power tools as often as possible.

3-by-a-treeYou can almost see their candy bracelet thoughts, can’t you?

AIdan-1 The eldest kid was the most cooperative, of course. He knocked out a tooth when he was not yet two, and it finally came in this summer. I thought (foolishly) that we’d finally have a non-gap-toothed smile for fall photos after six years. Of course, he lost another tooth 2 weeks ago.

Boys-Edited Brothers. They spent all afternoon raking leaves into piles then jumping in the yesterday. The same boys that still insist I kill any bugs they see. I didn’t point out the amount of life in a pile of leaves. They both passed out by 7:30 and didn’t want to get up this morning for school at 7:00, they were so tired.

E-with-PumpkinsWho is this sweet little girl? Obviously our daughter was kidnapped by aliens and replaced with a vastly less dramatic version.

Finn-Face-Edit

Again, I’m pretty sure he’s calculating just how big the candy bracelet will be. This one is always thinking and always surprising my with the results.He asked last month why Johnny Appleseed died. I explained that when people get really old their bodies wear out. This one says, “Well, we better call grandma and warn her!” So we did. She thought it was hysterical. I think.

Laughing-EI realize this is not focused. It’s just such a joyful shot of her, though!

Leafy-Head He thinks he’s the first kid to ever think of leaves as a hat. And that’s okay. It made him smile his real smile, not his get it over with quickly smile.

Finn-StandingMy kid who has mastered layering for school, as well as posing for me. He looks so cute in a t-shirt, button-down, and sweater, but my laundry piles are increasing exponentially. Of course, today he wore a blue and gray t-shirt with “Mathlete” on it and brown sweats. Not such a great fashion look.

Kids-in-leavesMy favorite. I already ordered a canvas print of it from Costco, and I can’t wait for it to arrive!

Yep, every year I have grand visions of the fabulous photos I’ll take in the fall. This year came pretty close, I think, to the vision. And, like labor (or so I’ve heard!), I’ve already forgotten the pain and suffering involved. Almost. Thank goodness for those little candy bracelets.