My blog has moved!

BREAKING NEWS!!!!
My blog has moved...Please visit me over at my new blog home:
http://www.chaosserveddaily.com/

You can sign up to follow via email or other paths there, and, if you do, please leave me a comment so I can thank you...and follow you back, if you'd like! Hope to see you there!

Wednesday, May 23, 2012

Round and Round It Goes

I found myself needing a vase for the allium buds the hooligans keep bringing inside, and I wanted something a bit rustic and outdoors-y.  So I saw a beer bottle next to the sink, waiting to be recycled, and thought, “Aha!”
  DSC_0001
One of my friends (with impeccable taste, because that’s the only kind of friend I have!) recently sent me a box filled with wondrous things, among them this twine dispenser.  Now I feel the need to use twine even more frequently, just to justify having it out on the counter.  What better to use for my vase?

DSC_0002
I put E6000 adhesive randomly on the neck of the bottle, and started wrapping.  As I wrapped, I added more adhesive as needed until I reached the bottom, where I tucked the end in neatly. It only took a few minutes to wrap the bottle, and I think a whole row would look very cool on a picnic table or mantel.

Those pistachios on the table next to the vase are like crack for the hooligans (and who am I kidding, they have the same effect for my GI Joe and me).  They’re Salt and Pepper Everybody’s Nuts from Costco…yes, we have to buy them by the boatload.  Try them, you’ll like them!

So before you put ALL your bottles in the recycle bin, maybe you, too, need a vase or three. As a bonus, it makes you look less like a lush to your recycle guy and neighbors if you use the bottles for something else!

Linking up to The Taylor House Thursday Party

Tuesday, May 22, 2012

Berry Cheesecake…in a Jar

I had a hankering for a cheesecake involving goat cheese, but since the temperature has been warmish, didn’t want to heat the house by using the oven for that long. So I came up with this, instead.

DSC_0027
It’s yumminess in a jar.  Why?  So I could, in theory, take it on a picnic.  Or for lunch.  Or upstairs to my big reading chair on a hot afternoon, along with a large frosty glass of iced tea.

I wanted a no-bake filling, so I started out with the “no-bake cheesecake” my grandma made.  Then I added some goat cheese for tanginess, fat-free Cool Whip to lighten it up, and fresh berries on top rather than a cooked cherry topping.

DSC_0005
I did turn the oven on for a bit to bake the graham cracker crusts.  I wanted them to be a bit crunchy.

DSC_0011
I let them cool while I mixed the filling, then spooned it in and smoothed it into all the corners and such by tapping the jars on the counter.

DSC_0017
After all that work (it took less than thirty minutes and only got one bowl dirty), I screwed the lids on and popped them in to chill until dessert time.

When ready to serve, I topped them with fresh strawberries and blueberries and garnished with a sprig of mint from the garden (I love writing that!).  If you wanted to take them on a picnic, I would freeze them without the berries, then top just before leaving for your picnic.  They’ll be perfectly thawed yet still chilled when you need them!

Berry Cheesecakes

(makes 6 jars but you could also just make one 9” pie instead…but that’s not as fun!)
1-1/2 cups graham cracker crumbs
3 Tbsp melted butter
3 Tbsp brown sugar
4 oz goat cheese, softened
1 can (14 oz) fat free sweetened condensed milk (NOT evaporated milk)
4 Tbsp lemon juice
2 cups (about half a small tub) fat free Cool Whip
fresh berries for topping
6- 8 oz mason jars

1. Preheat oven to 350 degrees.

2. To make crusts: Combine graham crumbs, melted butter, and brown sugar in large bowl. When well mixed, spoon about 4 Tbsp of the mixture into each jar., then press firmly with the back of the spoon to form your crust. Place the jars on a cookie sheet for baking, just to make it easier to put them in and take them out of the oven.

3. Bake 6 to 8 minutes, until slightly darker. Remove from oven and let cool while you make your filling.

4. To make filling: Cream together goat cheese and sweetened condensed milk, then stir in lemon juice. Fold whipped topping in, then spoon into jars, dividing evenly and leaving room for berries.

5. Replace lids and chill until ready to serve. Top with fresh berries
 
 Click here to print the recipe


Linking up to The Taylor House Thursday Party   
and Frugal Girls Chic and Crafty

Monday, May 21, 2012

Here, There, and Everywhere

I admit it…I was a blog slacker for a couple of days last week.  So, as a reward for your patience, here’s a look at the daily life that was keeping me busy over the past week and a half or so. Tomorrow, I’ll be back with something crafty!
IMG_4372   readingIMG_4373
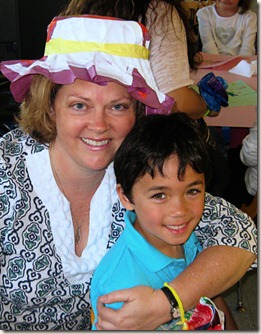
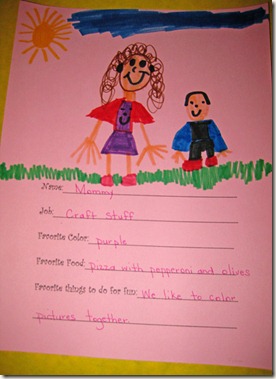
My kindergartener invited me tea to at his class for Mother’s Day.  It was lovely, with bonnets and corsages made by the hooligan and refreshments made by his teachers.  They sang a few adorable songs and then read to us.  He read “The Grouchy Ladybug,” which is one of our favorites…”Want to fight?”  comes up often in conversation at our home.

I was thrilled to see that my job is to “craft stuff” according to him.  Most of the moms’ jobs involved cleaning. I was just happy it didn’t say “Laying on the couch eating bonbons and watching TV.”




garden-everybody   garden-1  garden-2
On Mothers’ Day, everyone pitched in to get the garden ready to plant. It’s only about 10 feet on each side, so it’s not like they had to cultivate 40 acres by hand. They found lots of long, fat, wriggly worms, so I think our vegetables will have some excellent soil this year…no excuses for puniness!
PT
After Princess Thundercloud had a timeout for flinging dirt with her shovel, they all lost interest and played Ring Around the Rosy. Oh, well.
                   

ring-around-the-rosie


Last Friday was Field Day at the hooligans’ school, so Thundercloud and I had a fabulous time watching the boys compete in running, jumping, and throwing.

IMG_0280
The kindergartener had apparently been working on his technique with his fourth grade buddy…his form certainly looks a lot better than he would have learned from me.  Oh, wait, I don’t run unless someone is chasing me.

As soon as Field Day was over, we packed up our gear and headed to the Wisconsin Dells for an Army Strong Bonds Family Wellness Retreat. What a great program the Army has.  We had classes for a few hours each day, then lots of free time to spend as a family.

IMG_4403  IMG_4393
We stayed at the Great Wolf Lodge, so spent large blocks of time in the waterpark.  The boys are fearless on the slides, and Thundercloud loved body-surfing in the wave pool.  I was just thrilled to get to wear a swimsuit. Not really. As the kids get older, though, I have to admit it’s much more fun to go to the waterpark with them.
IMG_4411
We also went on a boat tour of the Upper Dells, largely to see this amazing feat.  These trained dogs leap from point to point.  My mother-in-law told us not to miss this.  As a little girl in Chicago, she came to the Dells and saw the same thing.  Not the same dog, of course.

Even more amazing was the backstory.  Way back when, someone in the Dells invented the first camera that could capture motion in a still shot.  That’s pretty cool, but the amazing part was that to demonstrate it, he made his thirteen-year-old son leap back and forth SEVENTEEN times to capture the perfect shot. 

Can you imagine what the kid’s mom said when she heard and saw the photograph?  I wonder if she then offered to take a perfect shot of her husband making that leap seventeen times?  And was she going to use a camera or firearm?

IMG_4425
As a last stop before starting home, we had lunch at our favorite barbeque joint, Famous Dave’s.  We’ve been to this chain all over the country, and, to be honest, most of the were mediocre at best, so we were disillusioned. When we lived in Kansas, the one at the Texas Speedway was outstanding and we were thrilled to find the one in the Dells just the same.

This hooligan’s nickname is Porkchop, and he loves ribs…so he was one happy camper yesterday!  Even if he was to exhausted from the weekend that his eyelids were closing.

So there’s a glimpse at our busy life…hopefully this week will be a little slower, because next week field trips then end-of-school activities really kick in. It’s been a great couple of weeks, though, with lots of family togetherness and counting our blessings…I hope you’ve had the same!

Tuesday, May 15, 2012

What’s Cookin’, Good Lookin’?

The moms’ group I belong to asked me to give a little talk on whatever I wanted to, so of course I chose cooking. A few years ago, I did a presentation at the Fort Lewis Women’s Conference on quick cooking, so I used those recipes, plus a few more freezer meals.

That presentation was the start of this blog, technically.  I needed a way to distribute all the recipes, so I jumped into the blogosphere and made my first post on “Chaos Served Daily.”  Then I didn’t blog for two and half years, but that’s a discussion for another day.

Here’s this week’s version of my talk, in brief.

My Ten Favorite Quick Recipe Meals (not those meals you can put together without a recipe, in your sleep…if you ever got any sleep)


  • Salisbury Steak with Mashed Potatoes and Country Green Beans
  • Mozzarella Chicken with Linguine and Chopped Salad
  • Chicken Pot Pie with Fruit Salad
  • Chicken Enchiladas with Black Bean and Corn Salad
  • Pierogies with Bacon and Green Peas
  • Chicken Penne Caesar Salad with Dinner Rolls
  • Mashed Sweet Potatoes and Pork Chops with Cider Gravy, Sauteed Apples and Onions
  • Chicken Yakisoba with Cucumber Salad
  • Lazy Day Lasagna with Green Salad
  • Sweet Potato-Sausage Hash with Waldorf Salad 
  • These recipes can be found on my blog post from 2009 or you can print them here.

    Ten Amazing Crockpot Meals (you’ll just need to add a freshly made side)

  • Taco Soup with Corn Pudding
  • Shredded Beef Sandwiches with Coleslaw and Alessi Frozen Fries
  • Pork with Sauerkraut and Apples with Steamed Broccoli
  • Jambalaya with Sourdough Rolls and Fruit Salad
  • Old-Fashioned Beef Stew Serve over couscous
  • Cola Pot Roast and Vegetables with Biscuits
  • BBQ Shortribs with Roasted Vegetables and Cornbread or Quick Grits
  • Black Bean Chili with Cornbread & Raw Veggies
  • Vegetable Curry Serve over rice or with flatbread
  • Roast Chicken Mashed Potatoes and Asparagus with Browned Butter Sauce 
  • These recipes can also be found on that same blog post, or you can print them right here.

    DSC_0001


  • For the moms’ group, I added a menu of ten freezer meals, with a grocery list, game plan detailing how to make the ten meals in four hours or less, and recipes.  Here’s the menu:

    Meals to Make for the Freezer
    • Pepper Steak with freshly made rice
    • Lime Cilantro Chicken to use in wraps, over salad, or with Mexican Rice
    • Huevos Rancheros with fresh fruit salad
    • Sausage and Peppers to use for sandwiches or with pasta and a salad
    • Vegetable Beef Soup
    • Cider Braised Pork Loin with Apples and Potatoes
    • Big Greek Pasta
    • Lasagna Ruffles
    • Butter Chicken with freshly made rice and cucumber strips with rice wine vinegar
    • Cottage Pie with fresh Waldorf Salad (apples, celery, craisins, almonds, and vanilla yogurt)


  • Here’s where to print them:
    Menu, Tips, and Schedule
    Grocery List
    Freezer Meal Recipes
    Once you do a round of freezer meal prep, I think you’ll love how easy it makes the daily “What’s for dinner?” answer.  I try to cook for the freezer about every six weeks, and making ten meals is perfect for us.
    I don’t use freezer meals every night, but they sure are nice on busy weeknights. In our home, we eat two or three freezer meals a week, I cook fresh a couple of nights, and we eat out once or twice a week.  We always have at least one night a week that’s leftovers, either reinvented or everyone can “order” off the leftovers menu.
    When I cook a fresh meal, I try to double it, so I can freeze a meal for later.  It really doesn’t take more than a few extra minutes to make a double recipe, yet saves me an hour in the future when I can use a freezer meal!
  • When the Cat’s Away….

    …the mouse will glitter!  Last week, GI Joe was off doing Army stuff in the wilds of Western Wisconsin for a few days.  The morning he left, Princess Thundercloud hardly let him get down the driveway before asking to paint her letters.  We had picked them up at Hobby Lobby a full three days earlier, and I guess she’d been biding her time to get me alone. She knows I'm a soft touch for blinging.

    Guess what color she wanted to paint them?  Pink and purple.  What a surprise, right?  She actually did a great job painting them, even waiting between coats for the paint to dry.

    DSC_0004When they were really dry, I brushed on a coat of Mod Podge and then sprinkled pink and purple glitter over them.  Heavily. She’s thrilled, and it took almost the whole morning to do, since we had to wait to do the steps. She was remarkably patient. It was also quite inexpensive.  The letters were on sale for $1.50 each, the paint was 53 cents a bottle, and I already had glitter and ribbon.

    DSC_0030
    Using shimmery white ribbon, we hung them from the rod that holds the quilt from her crib set. No, I never used the quilt as actual bedding…that’s not safe and I’m an excellent mother. Really.  It made a better wall hanging over her headboard.

    Anyway, back to the star of our post…she thinks she’s the Queen of the World. I write that as if she didn’t already.

    Monday, May 14, 2012

    Leaning Tower of Pottery

    I’ve once again been spending way too much time on Pinterest.  I pinned this a few weeks ago, and my GI Joe helped me make it last weekend.

    DSC_0019
    The original inspiration can be found at Home Stories A to Z.  Hers has a bird bath on top, with flowers in the pots.  I needed a place for herbs that the deer wouldn’t eat them.  This spot right next to our front door is about the only place I haven’t seen the deer grazing happily away on my shrubs and flowers.  So far, so good…no deer.

    To make it, I used one large clay pot and four smaller ones, along with a 48” piece of rebar. I’m a little worried there’s not enough of the rebar in the ground, but it seems stable. The hubs pounded the rebar in about a foot and a half.  He also is to thank for the wonderful spray painting of the pots. I hate spray painting, so I was glad he was willing to do it.

    When your pots are dry and the rebar is in the ground, you just start stacking your pots, filling them with soil and plants as you go.  I planted cilantro, rosemary, basil, tarragon, oregano, thyme, and lavender.  Nifty, eh?

    DSC_0021
    The only tricky part was making sure the rebar goes in straight and that your bottom pot is sitting flat on the ground and large enough to stabilize the whole tower.

    I’m so excited to have fresh herbs for the summer, and I love the splash of color this tower provides in the flower bed.  As you can see, the flower beds have pretty much exploded here since we had such a mild winter and early spring. Who knew there were so many shades of green?

    I’m posting this over at the Taylor House for the Project Pinterest Challenge.  It’s a fun idea; just link up to your project that was inspired by something on Pinterest.  Check it out for some great inspiration, or to add your own link.


    By the way, here’s the original photo that inspired me! How could you not be inspired by that?

    image

    Friday, May 11, 2012

    Creamy Peanut Butter and Chocolate Pie…Yum!


    It’s Dessert Extravaganza Day at the boys’ school for the end of Teacher Appreciation Week, and I’m a little embarrassed to say I’m taking this not-really-from-scratch pie. My justification is that there will be so many choices, a truly homemade treat might not be fully appreciated.  That sounds good, right?

    If you love Reese’s, this is a marvelously flavor-packed pie. We eat peanut butter more than any other food at our house, I think.  Even though we’re not big chocolate fans, it does serve to help the spotlight shine on the peanut butter in this recipe, so we love it.  I hope you do, too!


    Peanut Butter Cream Pie

    8 oz reduced fat cream cheese, softened
    1 cup natural peanut butter
    14 oz. can Fat Free Eagle Brand Sweetened Condensed Milk
    12 oz Cool Whip Free
    2 chocolate graham (or Oreo) pie crusts
    2 cups mini peanut butter cups (the really small ones…mine were from Trader Joe’s)
    About 6 Tbsp chocolate syrup(3 Tbsp per pie), for drizzling

    1. With an electric mixer (yes, I used a wooden spoon), blend together cream cheese, peanut butter, and sweetened condensed milk until completely smooth.

    2. Fold in Cool Whip until blended.

    3. Divide evenly between the pie crusts. Top with mini peanut butter cups and chill for at least 8 hours. The pies can be frozen at this point, if you think that will slow your consumption of them.

    4. Just before serving, drizzle with chocolate syrup. Then enjoy it!

    And now (drumroll, please), I’m trying something new today…adding the link below that you can click on and print…wahoo!  If it works.  But I think it will. I’m sure you’ll let me know if not.

    Click here to print the recipe

    Linking up to