***UPDATE*** Before continuing with this post, I wanted to tell you that I have a new
blog home. I'd love for you to visit (all my old posts are there, along
with brand new ones), and subscribe over there, since I can't transfer
my subscribers over for some reason. If you decide to follow, leave me a
comment so I can thank you...and follow back if you have a blog! Also,
I'm trying to convince the hubs that this IS a real job, so I need all
the followers I can get! Thanks so much...
http://www.chaosserveddaily.com/
It seems I need small baby gifts frequently, for soldiers, coworkers, or friends. And they seem to come in waves, so I needed something I can mass produce and be set for six months or so. Of course, I read there’s a
Fifty Shades of Gray baby boom going on, with babies due in February, so who knows how many blankies I’ll need then!
I like to give these tag blankies for babies to use as teethers or tactile learners, along with a copy of one of our favorite books. It makes a thoughtful, yet affordable, gift.
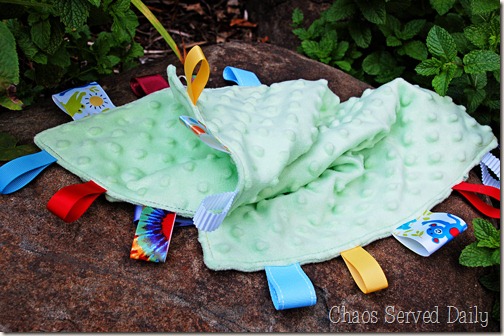
About ten years ago, “tag” things were all the rage…books, blankets, teething cloths, you name it. I’m not sure if they’re still so prevalent, but I figured out how I could make them for next to nothing. (In this case, next to nothing adds up to about $3, if I have to buy ribbons and can’t just pull from my stash.)
To make these, you’ll need some soft chenille-type microfleece. One and a half yards of 60” wide fleece will make 6 blankets. I always buy it on sale or with a 40% off coupon at Joann’s. You’ll also need 10 or 12 different, closely wovan, fabric ribbons. You’ll need two pieces of each, 4” long.

Cut two pieces of fleece 14”x14” for each blankie. On the right side of one piece, fold each ribbon in half and pin he cut edges along the sides of the fleece.
I do this assembly line fashion, cutting everything then pinning all the squares.
Next, place another square of fleece right sides together with the ribbon pinned one.

Stitch around the edges, leaving a space about 3 inches or so not sewn. Clip the corners, as shown above, then turn the blankie right side out, pulling the fabric through the unsewn part. Remove the pins, tuck the raw edges from the unsewn part inside, and topstitch around the entire square.

See? I told you it was easy! I try to make mine pretty unisex in color, since I make them to stock my gift trunk. You can make several of these in an afternoon (or an evening while watching mindless television) and when a baby is born, you’re ready to give a fabulous present!
 Isn’t this a fun little bracelet? Guess where I saw the idea? Yep, Pinterest. They take literally a few minutes to make, and are a perfect little accent for your crafty friends.


